
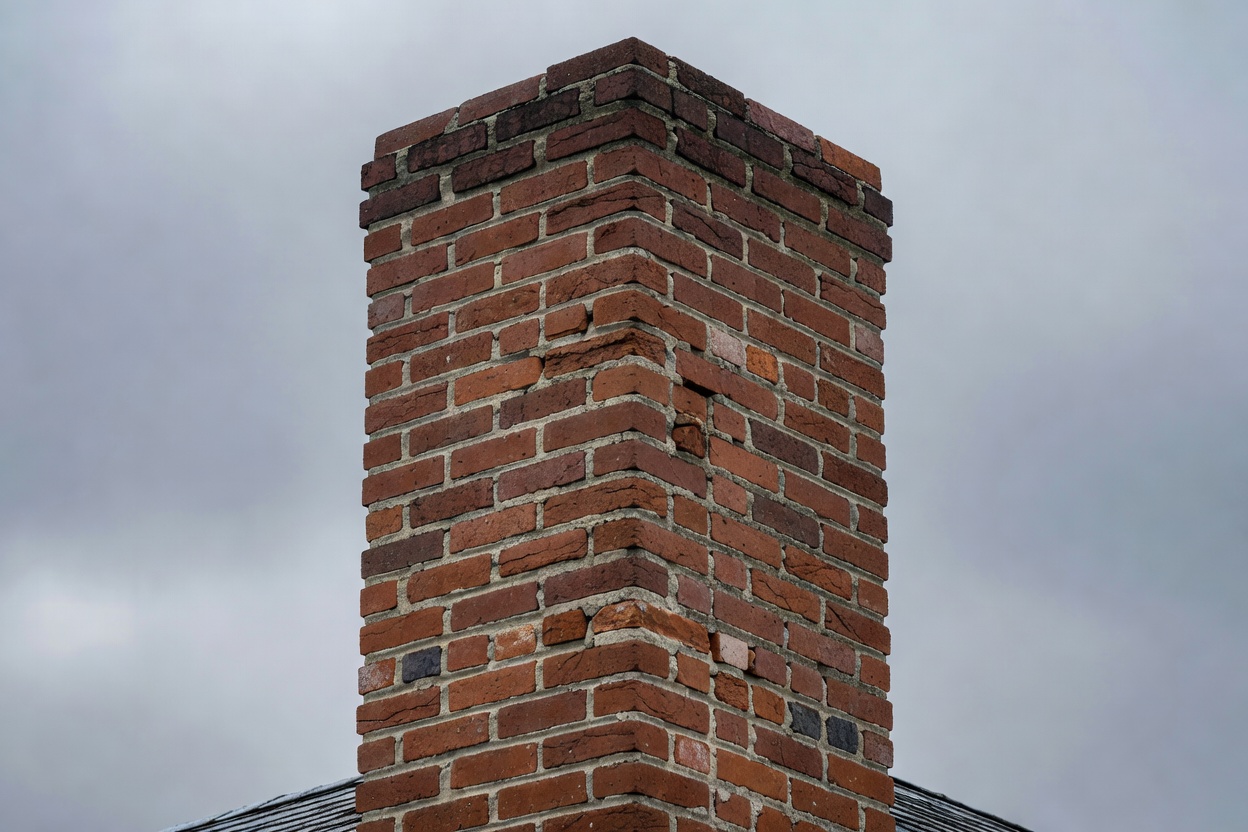
Reliable Chimney Mortar Repair Smithtown NY: 2026 Guide for Plainview Residents
Most homeowners assume crumbling chimney mortar is a cosmetic problem something to deal with eventually, maybe when they repaint the house or tackle the roof. We hear that reasoning constantly, and it’s the one misconception that costs Long Island homeowners the most money in the long run. Chimney mortar repair Smithtown NY and across Nassau County is far more urgent than it looks from the driveway. By the time mortar joints are visibly crumbling, water has often already been working its way into the masonry for a season or two.
A homeowner in Plainview called us last spring after noticing that sections of mortar between her chimney bricks were soft enough to scrape out with a fingernail. She had been told by a general contractor the year before that it was “minor weathering” and not worth fixing yet. When our technician got on the roof, we found that two courses of bricks near the crown had shifted, the flashing seal had broken, and the interior liner showed staining from water infiltration. What started as a straightforward tuckpointing job had become a more involved repair because of that one delayed season.
Long Island’s coastal climate makes this kind of deterioration faster than most homeowners expect. Freeze-thaw cycles through a Plainview winter, salt air drifting in from the South Shore, and the high humidity of late summer all work on mortar joints simultaneously. According to CSIA regional guidance, this coastal environment accelerates mortar joint deterioration and chimney masonry damage faster than inland regions, making annual inspections especially critical for Nassau and Suffolk County homeowners.
The Problems We Actually Find and How We Diagnose Them
There is no single “chimney mortar problem.” When we arrive at a job in Plainview, Hicksville, or over in Smithtown, we’re looking for several distinct failure modes, each with its own cause and fix. Here’s what that diagnostic process looks like in practice.
Recessed or Missing Mortar Joints
Symptom: joints look sunken, shadowed, or you can push a tool into them more than a quarter inch. Cause: standard weathering accelerated by freeze-thaw expansion. The mortar absorbs water, freezes, expands, and the bond breaks down from the inside. Professional fix: full tuckpointing the old mortar is ground or chiseled out to a consistent depth (typically half an inch to three-quarters), the joint is cleaned of dust and debris, and new mortar matched to the existing composition is packed in and tooled to shed water. The key diagnostic question here is depth shallow repointing without removing the deteriorated material is one of the most common shortcuts we see from less experienced contractors, and it fails within a season or two.
Spalling Bricks with Mortar Failure at the Face
Symptom: brick faces are flaking or popping off, often accompanied by white efflorescence staining. Cause: water has moved past the mortar joints into the brick itself, freezes, and forces the face off. This happens frequently on older Plainview homes where the original mortar was a softer lime mix and was later repointed with a modern Portland cement mix that is too hard and too rigid. The harder mortar doesn’t flex with the brick; it transfers stress directly into the masonry unit. Fix: remove the incompatible mortar, replace damaged brick courses, and repoint with a mortar mix matched to the original hardness rating. A proper repair requires knowing the brick’s absorption rate something a contractor should be able to explain to you.
Crown Cracking
Symptom: visible cracks across the flat or sloped top of the chimney, sometimes with chunks missing. Cause: the chimney crown takes direct exposure to UV, rain, and freeze cycles with no protection. A crown that was poured too thin, or without a proper drip edge overhang, fails within ten to fifteen years even on a well-built chimney. Fix: small cracks can be sealed with a flexible crown sealant product. Significant cracking or structural failure requires removing the old crown completely and pouring a new one with proper thickness (at least two inches at the thinnest point) and the correct overhang to direct water away from the flue. We see a lot of “painted over” crowns on homes in Merrick and Baldwin that look fine from the ground but are cracked underneath.
Flashing-to-Mortar Joint Failure
Symptom: water stains on the ceiling near the fireplace, or visible gaps where metal flashing meets the chimney masonry. Cause: the counterflashing is embedded in the mortar joints, and when those joints fail, the flashing lifts and the seal breaks. This is often misdiagnosed as a roofing problem. Fix: rake out the deteriorated mortar in the reglet (the channel where counterflashing sits), reset and seal the flashing, then repoint those joints. We always check flashing as part of any mortar assessment — they are directly connected failure points.
Chimney Lean or Brick Displacement
Symptom: the chimney stack looks visibly off-plumb, or individual bricks have shifted outward. Cause: severe mortar failure over multiple seasons, sometimes combined with inadequate footing or settling. This is a structural concern. Fix: partial or full chimney rebuilds above the roofline, depending on how many courses are affected. This is not a DIY repair, and it is not a job for a general mason who doesn’t work on chimneys regularly. The NFPA Standard 211 requires chimneys to be free from structural defects — a leaning stack is a code issue, not just an aesthetic one.
Interior Mortar Joint Failure in the Firebox
Symptom: white or gray powder falling into the firebox, visible gaps between firebrick, or loose refractory panels. Cause: refractory mortar (the material used inside the firebox) is a different formulation than exterior masonry mortar. It degrades from heat cycling, not weather. Fix: the firebox is cleaned out, deteriorated refractory mortar is removed, and the joints are repacked with appropriate high-temperature refractory mortar or panels are replaced. Using standard mortar inside a firebox is a serious mistake it won’t withstand the heat and will fail quickly.
Choosing the Right Contractor — Credentials, Questions, and Red Flags
This is where homeowners in Plainview, and across Long Island from Valley Stream to Great Neck, get into trouble. Chimney mortar repair looks straightforward, so it attracts contractors who are not actually trained in chimney systems. Here’s what to look for and what to walk away from.
CSIA certification matters. The Chimney Safety Institute of America credentials technicians on chimney system diagnostics, not just cleaning. Ask any contractor you’re considering whether they hold a current CSIA Certified Chimney Sweep designation. It’s a reasonable question, and a qualified contractor won’t be offended by it.
Ask specifically what mortar mix they plan to use. This is a real diagnostic question, not a trick. The right answer involves the contractor asking you about your brick type or doing a visual inspection before committing to a specification. A contractor who quotes you a job without asking about the existing mortar composition is likely to use whatever they have on hand which may be incompatible with your masonry.
Be cautious of pressure tactics tied to scare language. “Your chimney could collapse any day” without a written inspection report and photos to support that assessment is a red flag. Legitimate chimney technicians document what they find. We provide photos from every roof-level inspection as a standard part of our process.
According to the U.S. Fire Administration, heating fires account for approximately 25% of all residential fires, and failure to clean and maintain chimneys is the leading contributing factor. That’s a real safety concern — but it also means the space attracts contractors who use fear to rush homeowners into unnecessary work. Get a second opinion if something feels off.
For pricing context: standard tuckpointing on a single-stack chimney in the Plainview and Smithtown area typically runs between $400 and $900 depending on the extent of joint deterioration and chimney height. A full crown replacement adds $300 to $600. Full rebuilds above the roofline run considerably more. Any estimate significantly below those ranges for a complete tuckpointing job deserves scrutiny — low bids often reflect shallow repointing, inadequate mortar, or both.
Can Any of This Be Prevented?
Yes, in large part. Annual inspections catch mortar joint recession before water gets into the brick. A properly sealed chimney cap keeps rain from pooling on the crown and accelerating deterioration. Chimney waterproofing treatments applied to the exterior masonry slow water absorption without trapping vapor inside the brick. Our chimney inspection service covers all of these points, and we can identify the early signs of mortar failure long before it becomes a structural or water-damage issue.
If you’re a homeowner in Plainview, Hicksville, Westbury, or anywhere in Nassau County, and your chimney is more than ten years old without a documented inspection, the mortar joints are worth a professional look before next heating season.
Contact Garden City Chimney Service to schedule an inspection or get a straightforward estimate on mortar repairs. We work throughout Long Island from Rockville Centre and Lynbrook to Smithtown and Massapequa and we’re glad to walk you through exactly what we find and why it matters before any work begins.
Frequently Asked Questions
How do I know if my chimney mortar needs repair or a full rebuild?
-
The distinction comes down to how many courses of brick are affected and whether there is any structural movement. Mortar joint deterioration that is limited to the surface — even if it’s widespread — is typically addressed with tuckpointing. When bricks have shifted, cracked through, or the chimney shows any lean or displacement, a partial or full rebuild above the roofline is usually necessary. A proper inspection with photos from roof level is the only way to make that call accurately. We don’t recommend deciding from the ground.
What is the difference between tuckpointing and repointing?
-
The terms are often used interchangeably, but there is a technical distinction. Repointing refers broadly to removing deteriorated mortar and packing in new material. Tuckpointing, in the traditional sense, involves applying two contrasting mortar colors — one to fill the joint and one to create a thin line that mimics fine-cut masonry. In everyday chimney work on Long Island, most contractors use “tuckpointing” to mean repointing, and what matters more than the label is whether the deteriorated mortar is fully removed to adequate depth before new material is applied. Shallow repointing over soft old mortar is a shortcut that fails quickly.
How long does chimney mortar repair last in Long Island’s climate?
-
A properly executed tuckpointing job using mortar matched to the brick type should last 20 to 30 years under normal conditions. Long Island’s freeze-thaw cycles and coastal humidity put more stress on exterior masonry than inland areas, so the quality of the mortar specification and the depth of joint preparation matter more here than they might in a drier climate. Applying a breathable chimney waterproofing treatment after the repair and keeping a chimney cap in good condition extend the life of the work significantly. Annual inspections help catch any early re-deterioration before it becomes a larger problem.
Related from Garden City Chimney Service: About Contact Home – Everything You Need to Know About Garden City Chi · Reliable Chimney Flue Liner Replacement Nassau County · Reliable and Safe